
For Peanuts birthday I went all out and created a great Sunshine and Fun theme. So I had to have an amazing invitation to go with the amazing 1st birthday party I was planning. I wanted to cut down on the cost so I created a self-mailing folded invitation. I got my inspiration on Pinterest of course, I downloaded some fun fonts and started designing.
The design is in landscape so that the envelope it ups up naturally in a reading format. You need to design the full page so it’s not just white space on the sides that surround it. 
You’ll notice the black lines in the corners on the template. These are your cut lines. 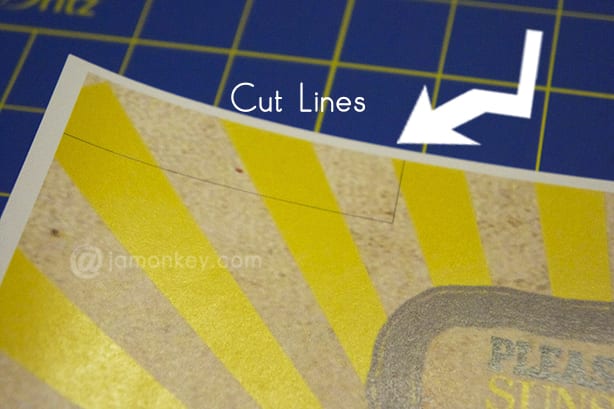
After you cut the corners off you need to score the edges that you need to fold. This ensures that you have a perfectly straight and clean fold. I used the back of an extremely duo Exacto knife. You can use a butter knife or a scoring knife as well. Make sure you use a ruler as well to keep you on track. 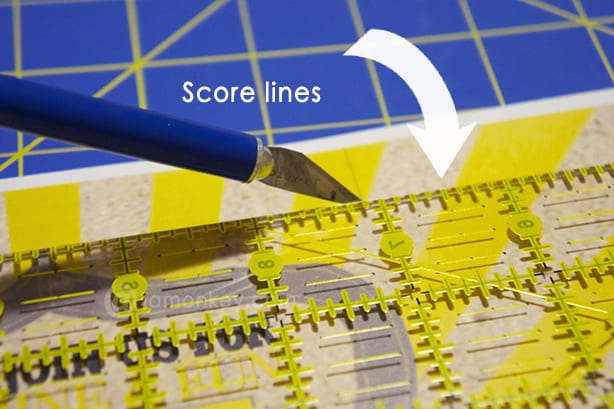
Start to fold your edges down and use something hard to press them down. 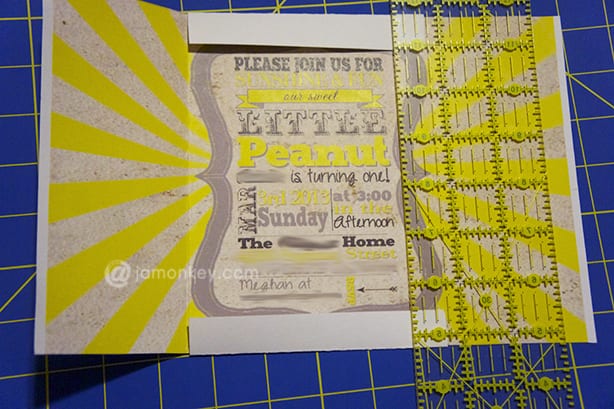
I started with the smaller pieces because they will be in the inside of the fold when you finish.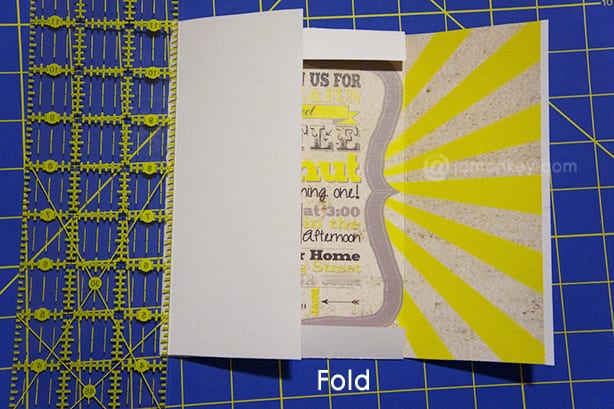
Then fold the sides in to complete the envelope shape. 
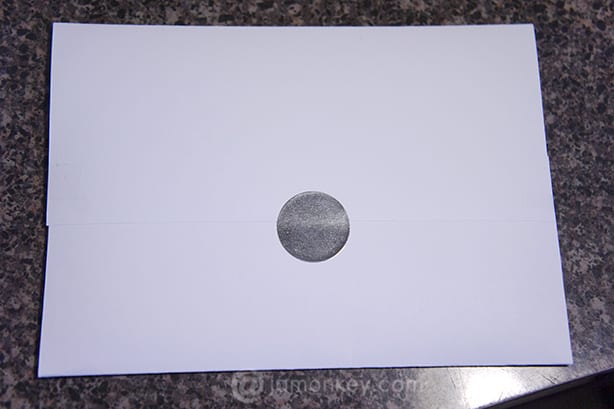
You’re invitation should look like the above picture. 
I was able to place a piece of 5X7 paper, a small self-addressed envelope and a letter inside the invitation for the out of town guests that I know wouldn’t be able to attend the party in person. (We did a scrap book of notes to Peanut). Place your RSVP returns right inside the invitation before you start to glue the sides.
Use picture adhesive glue that is resealable. You want your guest to be able to open the invitation when they receive it without tearing it in half. Place the glue on both of the smaller edges. then fold on side piece onto it. Fold the other side piece over to see how much of an overlap you have. Place a little glue on this area to keep the last piece in place.
For the final touch, seal your invitation with an envelope sticker. If you get all fancy and use wax on your envelope just remember you are paying more in postage because they cannot go through the letter sorting machine. If your glue isn’t holding up on the inside ( I wouldn’t recommend the Staples kind) you can simply place a tiny piece of tape on the sides to ensure nothing falls out during its journey.
Everyone complimented on how cute and clever the design was. It was very simple to make.
This template is in PSD (Photoshop form)
Download the template for the Self Mailing / Folding Invitation template here.
See the full Sunshine and Lemonade party.

What a great tutorial! You may it look so simple and I love those invitations 🙂
What a fun design for an invitation!
You are absolutely awesome. What a great idea! And you make it look so easy.
That is a great idea and it looks beautiful. I would probably mess it up because I’m not very good at those things, but if you are, definitely do it.
oh how neat and original – love this idea! What a great way to receive a package!
Super cute! Great design and tutorial.
What a great idea 😀 Thank you so much for a step by step guide 🙂 x
Meghan you are a very talented woman!! My daughter’s birthday party is coming up and I always buy the invitations… but I have been inspired!
Your invitations are beautiful!!
That’s pretty impressive! The final results look totally professional.
That is AWESOME! This would be a lot of fun for many things, not just party invites.
Very neat – I might do this with Christmas Cards!
I LOVE these!! I will definitely have to find a reason to make them! 😉
Wow, that is such a great idea! I wish I were more crafty though.
OMGosh! How cute! I’ll definitely have to make some of these soon!
Wonderful tutorial – that looks really neat!
I like the idea of this invitation, I actually can do it by myself. Thank you for this great inspiration, I love it.
I LOVE this idea! I don’t see the download, I’m sure I’m just missing it! Could you help?
I updated the post, it looks like the link was stripped.